This blog will be about my tooling process, aka how to stamp an image into leather. I am by no means an expert, as I am self taught, so this will be how I tool my leather.
Leather tooling or leather carving is cutting into a wet piece of leather then using stamps to impress an image into the leather. Leather tooling is how you can customize projects. Veg tanned leather holds impressions the best, that is why I use that type of leather the most. It will also keep its shape after wet molding. You can completely soak the leather and mold it around a shape, like a pistol or flask, once it is fully dried, it will retain the shape.
Direct from wikipedia -
Vegetable tanning
Vegetable tanning uses tannins (a class of polyphenol astringent chemicals), which occur naturally in the bark and leaves of many plants. Tannins bind to the collagen proteins in the hide and coat them, causing them to become less water-soluble and more resistant to bacterial attack. The process also causes the hide to become more flexible. The primary barks processed in bark mills and used in modern times are chestnut, oak, redoul,tanoak, hemlock, quebracho, mangrove, wattle (acacia; see catechol), and myrobalans from Terminalia spp., such as Terminalia chebula. Hides are stretched on frames and immersed for several weeks in vats of increasing concentrations of tannin. Vegetable-tanned hide is not very flexible and is used for luggage, furniture, footwear, belts, and other clothing accessories.
The first thing I do when I have something to tool is to transfer the image I want to tool. I am not much of an artist so what I usually do is find an image I like and crop the size, then use carbon paper to copy the image, then make any necessary adjustments. Sometimes I will freehand the picture if I feel comfortable with it.
After the image is drawn onto the leather, the next thing to do is casing. Leather casing is when you add water to vegetable tanned leather, letting you manipulate it in different ways from cutting it with a swivel knife, tooling or forming it. When I case my leather I get it completely soaked then I will put it in a sealed plastic bag for a few hour so the moisture is trapped and can spread evenly throughout the leather. Once I feel the leather is evenly wet I take the leather out of the bag and set it on a clean flat surface to dry. You don't want it to be completely dry, what you are looking for is when the leather looks like its back to its dried state but cool to the touch. If you start tooling leather while its too wet then the impressions wont be as deep and can come back up.
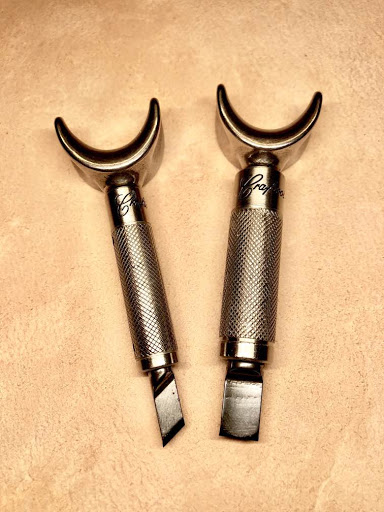
Once the leather is cased and ready to tool then I will get my swivel knife
The swivel knife is made up of 3 basic parts, the blade, the barrel and the yoke. Swivel knives are used to carve decorative cuts in leather. They are held upright with your thumb and middle finger controlling the barrel and your pointer finger pressing on the yoke. After every few cuts, I will strop the blade so it is nice and sharp again. There are many different swivel knifes of different quality and use. Using a swivel knife isn't very difficult, but using it well is. I am still learning the intricacies 5 years later. The two I use most are pictured above, both are the Craftool pro.
The are different ways to tool the leather, and tons of different stamps that do different things. Here are all the tooling stamps I own.
Basket weave stamps
Decorative stamps
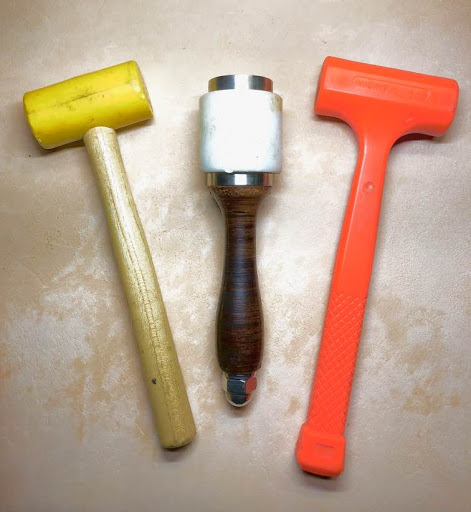
The hammers and mallet I use for tooling
For this example, I will tool 3 horses 3 different ways. One will be matted inside the horse, one beveled outside with and expanded background and on parts inside to give depth, and one beleved outside and detailed using a modeling tool
Here are some bevelers, I use these stamps the most
You can bevel the inside and mat it down so its beneath the surface, you can also have line lettering. Below are matting tools
On this horse, I used the swivel knife to cut out the horse, then beveled to the inside and used a matting stamp all around the inside
Also you can use a modeling tool to do details or add depth
For this horse, the swivel knife was used to cut the outside of the horse and the legs, mouth, eyes and hair detail. Then I beveled the outside and parts of the legs and hair to ad depth. After that I came back with a background stamp and to make the horse pop off of the leather a little more.
Here are the modeling spoons that you can use for more detail
Finally with this horse, I beveled the outside of the horse then all I used was the modeling spoons to create subtle details and make the horse look more 3-D.
These are just a few samples of what you can create when you tool vegetable tanned leather. I have been doing this for a few short years and am still learning with each project.


